Short answer: Yes, you can DIY a full vehicle wrap—but doing it well isn’t “easy.” Success depends on prep, environment, film choice, tools, and technique. This guide gives a clear-eyed look at what’s hard, what’s manageable, and when to call a pro—grounded in manufacturer installation guidance and real-world shop best practices.
DIY vs Pro: What Makes Wrapping Difficult?
- Large, compound curves & deep recesses. Doors and hoods are forgiving; bumpers, mirrors, and tight channels aren’t. Films can conform, but overstretching weakens adhesive and shortens life. Post-heating edges is critical to prevent lifting.
- Environment control. Manufacturers recommend working in a clean, enclosed, climate-controlled space—roughly 65–75°F (18–24°C)—to keep adhesive behavior predictable and dust down.
- Temperature thresholds. Typical guidance: minimum substrate/ambient >10–16°C for cast wrap films; below that, bonding slows and you’ll fight lift.
- Method matters. Air-egress (RA) films are designed for dry application; wet installs can trap fluid and reduce tack.
Prep and Workspace: The Foundation of a Good Wrap
Plan for a full wash, decontamination (clay or similar), and edge degreasing (IPA). Chips, failing clear coat, and contaminants telegraph through film. Work indoors with bright lighting and room to walk around the vehicle. If you’re exploring colors and finishes, start at our car wrap hub to see film options and specs before you begin. (Internal link)
Tools You’ll Actually Use
- Heat gun (for controlled heating, not blasting) and an IR thermometer.
- Hard/soft squeegees with fresh buffer sleeves; felt edge for gloss surfaces.
- Knifeless tape to cut film without risking paint.
- Magnets or masking tape for positioning; quality blades only for edge trimming.
Film Behavior 101: Heat, Stretch, Post-Heat
Modern cast wraps are conformable—but “heat, then push” beats “pull until it fits.” Use gentle heat to relax film into curves, avoid white-facing on high-stretch zones, and post-heat convex/concave areas and edges (often 90–95°C specified by film makers) so memory is reset and edges stay down.
Common DIY Failure Points (and Fixes)
- Edge lift within days. Cause: insufficient post-heat or dirty edges. Fix: clean, re-tack, and thoroughly post-heat edges after install.
- Silvering/microbubbles in reflections. Cause: too little squeegee pressure or installing cold. Fix: follow temp guidance and use systematic, overlapping squeegee strokes.
- Peel at tight inlets. Cause: overstretch. Fix: pre-stretch and relax technique or seam with knifeless tape rather than forcing a single piece.
How Long Will It Last?
Service life depends on color, finish, and exposure. As an example, ORAFOL lists application temperature >+15°C and maximum durability up to 10–12 years for certain colors in vertical exposure (less for metallics and harsh conditions). Real-world daily drivers typically see shorter lifespans due to sun, washing, and abrasion.
Should You DIY Your First Full Wrap?
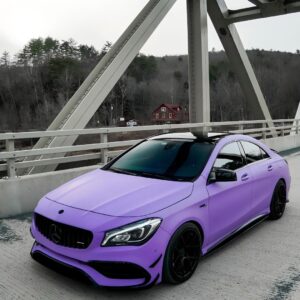
If you’ve never wrapped, consider starting with a roof, hood, or mirrors to learn heat control and edge finishing—then commit to the full vehicle. For inspiration and product selection across finishes, browse our glossy car wrap collection or explore texture and sparkle in metallic vinyl wrap. (Internal links)
When a Pro Is the Better Value
Pros bring dedicated install bays, dust control, jigs, and muscle memory for bumpers and mirrors. They also warranty workmanship. If your vehicle has complex aero, previous paint repairs, or your work area is dusty/cold, professional installation reduces risk of lift lines and cut marks. Manufacturer guidance is clear: environment, temperature, and technique are non-negotiables.
Vinyl Wrap vs PPF: Choosing the Right Film
Color-change vinyl wraps are about aesthetics with moderate protection; paint protection film (PPF) is a thicker aliphatic TPU designed for impact and self-healing. If your priority is rock-chip resistance without changing color, consider Paint Protection Film. (Internal link)
A Simple DIY Plan
- Assess panels: Attempt hood/roof first; leave bumpers for last.
- Control climate: Aim for ~65–75°F (18–24°C), clean, enclosed bay.
- Dry method for RA films: Keep fluids away from air-egress adhesives.
- Use knifeless tape for seams/reliefs; avoid cutting on paint.
- Post-heat edges and high-stretch zones per film guidance.
Explore More from ALUKO
If you want a deeper dive into materials, maintenance, and panel strategy, check our in-depth tutorial: The Complete Guide to Automotive Wraps. (Internal link)