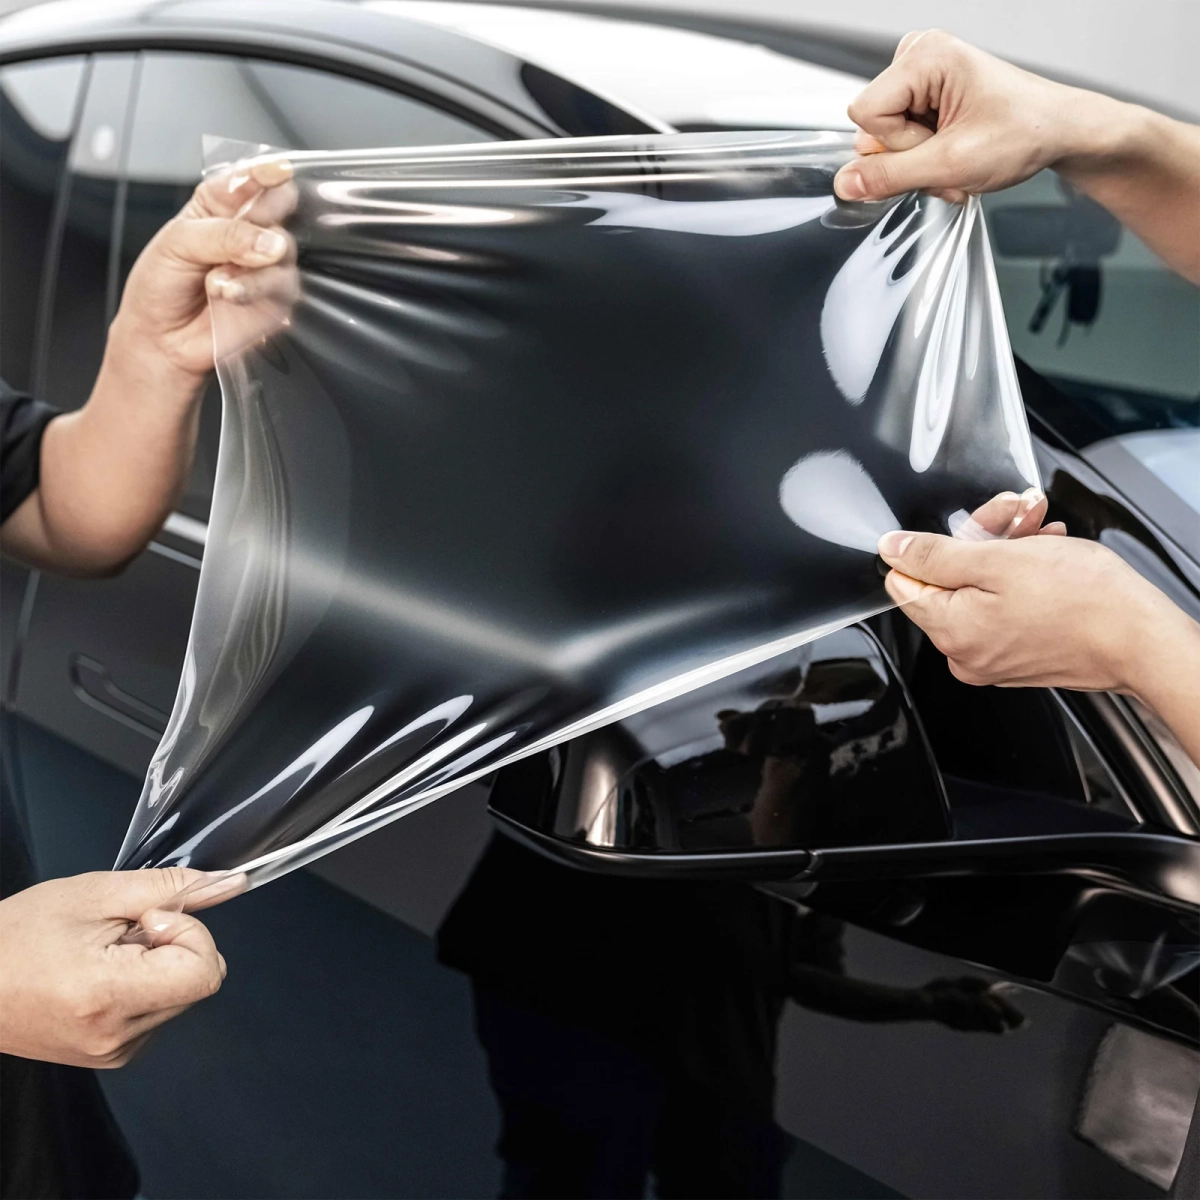
Removing old clear PPF wrap is not simply a matter of finding a corner and pulling. The film’s age, adhesive condition, installation surface, temperature, and condition of the underlying paint can all affect how cleanly it comes off.
When a relatively new film is removed from properly cured OEM paint, the process can be straightforward. However, older or weathered PPF may become brittle, split into small pieces, or leave adhesive behind. Repainted panels can also behave differently from original factory paint.
The safest approach is therefore to control temperature, removal angle, pulling speed, and surface condition rather than relying on force.
Avery Dennison’s PPF installation bulletin recommends removing its film by lifting a corner and pulling at approximately 0°–45°, while noting that removal becomes more difficult when the film or vehicle is cold or when the film has been installed for a long time. The company recommends a film and surface temperature above 55°F (13°C) for easier removal.
This guide explains how to remove clear PPF wrap, what tools you need, when heat should be used, how to deal with adhesive residue, and when DIY removal should be avoided.


6
Quick Answer: How Do You Remove Clear PPF Wrap?
To remove clear PPF wrap safely, clean and warm the vehicle, lift an edge without cutting into the paint, then slowly peel the film back at a shallow angle while keeping the film close to the panel. If the film becomes difficult to pull or starts breaking, stop and apply controlled heat rather than increasing pulling force. After removal, clean any adhesive residue with a compatible automotive adhesive remover and inspect the paint before installing new film.
The basic process is:
- Wash and dry the vehicle.
- Inspect the paint and film condition.
- Warm the film and panel.
- Carefully lift an edge.
- Pull the film back at approximately 0°–45°.
- Keep the removal motion slow and even.
- Reheat sections when necessary.
- Remove remaining adhesive with a compatible product.
- Clean and inspect the paint.
- Prepare the surface for the next protection or wrap installation.
The most important principle is simple:
If the film resists, do not pull harder. Change the conditions first.
Why Does Clear PPF Wrap Become Difficult to Remove?
PPF is designed to stay attached to the vehicle for an extended period, so removal characteristics depend heavily on the condition of the film and adhesive.
Several variables can make removal more difficult.
Film age
As PPF ages, exposure to sunlight, heat, moisture, washing chemicals, road contamination, and repeated temperature cycles can change the film’s physical properties.
An older film may become less flexible and more likely to crack or tear during removal.
Adhesive aging
The adhesive is another important variable.
A newer film may release relatively cleanly, while an older installation can leave more adhesive residue behind.
Avery Dennison specifically notes that PPF removal performance can be compromised when film has been applied for a long time or when the film and vehicle are cold.
Temperature
Cold film is generally less cooperative during removal.
Avery Dennison recommends a film and surface temperature above 55°F (13°C) for best removal results. XPEL’s TracWrap removal instructions similarly recommend warming the film with sunlight, a heat gun, or hair dryer before peeling.
Paint condition
This is perhaps the most overlooked issue.
PPF removal is not only about the film.
The condition of the substrate matters.
A properly cured OEM paint surface is very different from:
- Freshly repainted panels
- Poorly cured paint
- Peeling clear coat
- Previously damaged paint
- Cracked paint
- Repaired body panels
- Non-OEM refinishing
Avery Dennison explicitly warns that clean removability is not guaranteed on non-OEM paint or other surfaces, while its PPF bulletin states that properly cured car paint provides the expected removal conditions.
What Tools Do You Need to Remove Clear PPF?
You do not need a large collection of specialist equipment, but using the right tools can significantly reduce the chance of damaging the substrate.
Recommended tools
- Microfiber towels
- Automotive shampoo
- Clean water
- Plastic razor or plastic scraper
- Heat gun or hair dryer
- Steamer, if available
- Nitrile gloves
- Automotive adhesive remover
- Clean microfiber towels
- Isopropyl alcohol or compatible panel cleaner
- Good lighting
For professional removal, a steamer can be particularly useful because it allows controlled heating of the film and adhesive.
However, heat should always be used carefully.
The goal is to soften the adhesive, not to excessively heat the paint, trim, plastic, or surrounding components.
3M’s current general film-removal bulletin explains that heat softens adhesive and reduces the force needed to remove film. It also warns that substrates can be heat-sensitive, so the appropriate heat method depends on the material being removed from.
Step 1: Wash the Vehicle Before Removing the PPF
Start with a thorough wash.
The purpose is not cosmetic.
It is to remove dirt, sand, road film, and other contaminants that could interfere with the removal process.
Pay particular attention to:
- Film edges
- Wheel arches
- Bumper areas
- Panel gaps
- Hood edges
- Rocker panels
Allow the vehicle to dry completely before beginning.
Ideally, work in a clean, shaded, controlled environment.
Avoid starting immediately after driving because extremely hot panels can make heat management more difficult. Conversely, attempting removal on a cold winter panel can increase film brittleness and adhesive resistance.
Step 2: Inspect the Film Before You Pull It
Before touching the edge, determine what condition the PPF is in.
Look for:
- Yellowing
- Cracking
- Surface checking
- Peeling edges
- Brittle sections
- Severe staining
- Deep scratches
- Previous repairs
- Areas where the film has already failed
This inspection determines your strategy.
Newer flexible PPF
It may peel in relatively large sections.
Older brittle PPF
It may break into smaller pieces.
Extremely aged PPF
You may need significantly more time and controlled heat.
This is why “just peel it off” is not a reliable universal instruction.
Step 3: Warm the Film
Heat is one of the most important tools in PPF removal.
The purpose is to soften the adhesive and make the film more flexible.
Avery Dennison recommends removing its PPF above 55°F (13°C) and notes that a heat gun or hair dryer can assist removal when conditions are colder.
XPEL’s TracWrap instructions similarly recommend warming the film with sunlight, a heat gun, or hair dryer to loosen the adhesive.
For professional work, steam can also be useful.


6
Do not concentrate heat in one spot
Keep the heat source moving.
You want the film and adhesive to warm progressively rather than creating a small area of excessive heat.
This is especially important around:
- Plastic trim
- Headlights
- Sensors
- Badges
- Rubber seals
- Repainted panels
Warm enough to improve release, but not so hot that the substrate or surrounding component is at risk.
Step 4: Find a Safe Starting Edge
Once the film is warm, locate an existing edge.
Good starting locations may include:
- Hood corners
- Fender edges
- Door edges
- Bumper edges
- Headlight protection edges
If there is no exposed edge, use an appropriate plastic tool to carefully lift a corner.
Avoid digging a sharp metal blade into the paint.
The objective is to separate the film from the surface without creating a scratch that remains after the PPF is gone.
Step 5: Peel the Clear PPF at a Shallow Angle
This is one of the most important parts of the process.
Do not pull the film straight upward from the panel.
Instead, pull it back close to the surface.
Avery Dennison specifically recommends an approximate 0°–45° removal angle, explaining that as the removal angle increases beyond 45°, the likelihood of adhesive residue increases.
XPEL also recommends pulling TracWrap toward the installer at a shallow angle of less than 45°.
Think of the process as stretching the film away from the surface, rather than lifting it vertically.
Why does the angle matter?
A shallow angle changes how force is distributed between:
- The film
- Adhesive
- Paint surface
This can help the adhesive release with the film rather than remaining on the vehicle.
Step 6: Pull Slowly and Consistently
Once the film begins releasing, maintain steady tension.
Avoid:
- Sudden jerks
- Rapid pulling
- Vertical lifting
- Twisting the film
- Pulling aggressively around corners
If the film begins to stretch excessively or tear, stop.
Apply more controlled heat and continue.
The objective is not to finish a panel as quickly as possible.
The objective is to remove the film with the least unnecessary stress on the substrate.
Avery Dennison’s vehicle-wrap training material makes a similar point for film removal: heat the film, pull evenly, and avoid quick movements because rapid removal can increase stress on the clear coat or paint.
Step 7: What If the PPF Breaks Into Small Pieces?
This is common with aged or degraded film.
Do not assume that more pulling force will solve the problem.
Instead:
- Warm a smaller section.
- Lift a new edge.
- Peel slowly.
- Keep the removal angle shallow.
- Repeat.
Older film may require considerably more labor than relatively fresh film.
This is one reason professional removal costs can vary substantially between vehicles.
A bumper covered with relatively new, flexible PPF may be removed comparatively quickly, while heavily aged film can become a labor-intensive process.
Step 8: How to Remove PPF Adhesive Residue
Even when the film itself comes off cleanly, some adhesive residue may remain.
Do not immediately attack the residue with an aggressive solvent.
First, determine what type of surface you are dealing with and use an adhesive remover that is explicitly compatible with automotive paint.
A safe general process is:
- Apply a small amount of compatible adhesive remover to a microfiber towel.
- Test an inconspicuous area.
- Gently work the residue.
- Allow the product to soften the adhesive.
- Wipe rather than aggressively scrape.
- Repeat if necessary.
- Clean the panel after residue removal.
3M states that its automotive film can be removed and that remaining residue can be cleaned; it recommends professional removal by a 3M Authorized Installer.
The important lesson is:
Use the chemical manufacturer’s instructions, not a random solvent recommendation from an online forum.
Different adhesive removers have different compatibility requirements.
Step 9: Inspect the Paint After Removal
Once the PPF has been removed, do not immediately assume that every visible difference is damage.
You may see:
- Adhesive residue
- Dirt around the old film edge
- Paint that looks slightly different from exposed areas
- Minor surface contamination
- Existing scratches previously hidden by the film
- Stone chips protected by the PPF
Sometimes the paint under the PPF looks better than surrounding areas because the film protected it from environmental exposure.
3M notes that areas covered by wrap can appear more vibrant or glossier after removal because they were protected from the elements.
At this stage, clean the surface and evaluate the paint under good lighting.
Can Clear PPF Damage Car Paint During Removal?
Yes, but the risk depends heavily on the condition of the paint and the film, and on how the removal is performed.
Properly installed PPF on properly cured OEM paint is designed to be removable.
Avery Dennison states that its PPF can be removed with nominal adhesive residue within its expected lifetime when applied to properly cured car paint, while also warning that clean removability is not warranted for non-OEM paint or unsuitable substrates.
3M similarly says removal within its wrap warranty period is very unlikely to cause damage, while noting that poorly cured resprays are more vulnerable.
Higher-risk situations include:
Fresh repaint
Paint may not have fully cured.
Poor-quality repaint
The film adhesive may bond more strongly than the paint layer itself.
Peeling clear coat
Removal can pull away already-compromised coating.
Existing cracks or chips
The PPF may reveal or worsen an underlying defect.
Very old film
Brittle film can require significantly more mechanical manipulation.
Aggressive removal
Pulling quickly or at an excessive angle can increase stress.
This is why professional inspection should come before removal on a questionable panel.
Clear PPF Wrap Removal vs. Vinyl Wrap Removal
Although both products are adhesive automotive films, their removal should not be treated as identical.
| Factor | Clear PPF | Vinyl Wrap |
|---|---|---|
| Main purpose | Paint protection | Styling/color change |
| Typical construction | Polyurethane-based PPF | PVC or other wrap construction |
| Removal method | Controlled peel + heat when needed | Controlled peel + heat when needed |
| Common removal concern | Aged/brittle film and adhesive | Adhesive, shrinkage and aged film |
| Paint condition | Critical | Critical |
| Removal angle | Important | Important |
| Old-film difficulty | Can increase significantly | Can also increase significantly |
| Professional removal | Recommended for difficult/aged film | Recommended for difficult/aged film |
The key point is that the adhesive and film construction determine removal behavior.
You should not assume that a technique that works perfectly on one vinyl wrap will produce the same result on PPF.
Should You Remove PPF Yourself or Hire a Professional?
DIY removal can be reasonable when:
- The film is relatively new.
- The paint is original and healthy.
- The film is flexible.
- You have controlled temperature.
- You have suitable tools.
- You can work slowly.
Professional removal is strongly preferable when:
- The PPF is severely aged.
- The film is cracking or yellowing.
- The vehicle has been repainted.
- Clear coat condition is questionable.
- Adhesive is extremely stubborn.
- The film is breaking into tiny pieces.
- The vehicle is high-value.
- You plan to install new PPF immediately afterward.
The cost of professional removal can be far lower than correcting paint damage caused by aggressive DIY removal.
What Should You Do After Removing Clear PPF?
The next step depends on your objective.
If you want another protective layer
A new ppf film installation can restore paint protection.
Before installing new film, the surface should be thoroughly cleaned and inspected.
If you want a color transformation
A color PPF installation can combine paint protection with a new appearance.
This can be useful for customers who want to move from transparent protection to a more customized finish.
If you want a lower-cost appearance change
A traditional car wrap can provide a much wider range of colors, finishes, graphics, and customization options.
The important point is that the paint should be in an appropriate condition before applying any new film.
Example: Removing PPF From a 5-Year-Old Daily Driver
Consider a hypothetical vehicle that has had clear PPF installed on the front bumper and hood for approximately five years.
The owner notices:
- Yellowing
- Surface scratches
- Edge contamination
- Reduced gloss
The owner decides to replace the film.
What should happen?
First, inspect the paint.
Next, warm the panel.
Start at an accessible corner.
Pull the film back at a shallow angle.
If the film releases in large sections, continue slowly.
If it becomes brittle, divide the panel into smaller sections and use controlled heat.
After removal, inspect the adhesive residue.
Finally, clean and decontaminate the panel before applying new protection.
The important lesson is that film age changes the removal strategy.
A five-year-old film should not necessarily be treated like a newly installed film.
7 Common Clear PPF Removal Mistakes
1. Pulling the film straight upward
This can increase unnecessary stress.
Better: Keep the film close to the surface and use a shallow removal angle.
2. Using too much heat
Heat is useful, but excessive heat can damage sensitive materials.
Better: Keep the heat source moving and follow the film manufacturer’s instructions.
3. Removing film from cold panels
Cold film can be harder to remove.
Better: Work in a controlled environment and warm the film appropriately.
4. Using a metal blade aggressively
A sharp blade can scratch paint.
Better: Use an appropriate plastic tool to lift the film.
5. Pulling faster when the film resists
Resistance is a signal to change the removal conditions.
Better: Stop, warm the area, and continue slowly.
6. Using an untested solvent
A strong solvent can create a new problem.
Better: Use a compatible automotive adhesive remover and test first.
7. Assuming the paint is perfect underneath
PPF can hide existing paint defects.
Better: Inspect the paint after removal under good lighting.
Clear PPF Wrap Removal: Professional Best Practices
For professional installers, removal should be treated as part of the entire PPF lifecycle rather than an afterthought.
Before installation, document:
- Paint condition
- Existing damage
- Repainted areas
- Installation date
- Film brand/product
- Coverage areas
This information becomes extremely useful when the film eventually needs to be removed.
For high-value vehicles, taking photographs before installation can also help distinguish pre-existing paint defects from issues discovered during later removal.
This is especially important when a vehicle contains aftermarket bodywork or previously repaired panels.
Frequently Asked Questions About Clear PPF Wrap Removal
Can you remove clear PPF yourself?
Yes, relatively new PPF installed on healthy OEM paint can sometimes be removed by a careful DIY user. However, professional removal is safer for aged, brittle, damaged, or difficult-to-remove film.
Does heat make PPF easier to remove?
Yes. Controlled heat can soften the adhesive and make the film more flexible. Avery Dennison and XPEL both recommend warming film when necessary for removal.
What angle should I use to remove clear PPF?
Avery Dennison recommends approximately 0°–45°, while XPEL recommends less than 45° for its TracWrap product. A shallow angle helps the film release more cleanly.
Does PPF leave glue behind?
It can.
Newer film installed correctly may remove with little residue, but older film, cold conditions, long installation periods, and certain surfaces can increase adhesive residue.
Can PPF removal pull off paint?
It can happen, particularly with poorly cured, damaged, repainted, or otherwise compromised paint. Properly cured OEM paint generally presents a lower risk when the manufacturer’s removal procedure is followed.
What should I use to remove PPF glue?
Use an automotive adhesive remover that is compatible with the vehicle’s paint and follow its manufacturer’s instructions. Always test in a small inconspicuous area first.
How long does PPF removal take?
There is no universal removal time.
A newer film that releases in large sections may be relatively quick to remove. An old, brittle film can take substantially longer because it may need to be removed piece by piece.
Can I install new PPF immediately after removing old PPF?
Potentially, but the paint must first be cleaned, decontaminated, inspected, and properly prepared. Any remaining adhesive or surface defects should be addressed before new film is installed.
Final Takeaway: Remove Clear PPF With Control, Not Force
Learning how to remove clear PPF wrap is less about finding the strongest tool and more about controlling the removal conditions.
The safest process is:
Clean → Inspect → Warm → Lift → Peel at a shallow angle → Reheat when necessary → Remove residue → Inspect the paint → Prepare for the next film.
The manufacturer’s instructions should always take priority because different PPF constructions and adhesives can behave differently.
The evidence from major manufacturers supports several consistent principles: warm the film when needed, use a controlled shallow peeling angle, avoid excessive force, and pay close attention to the condition of the underlying paint. Avery Dennison specifically recommends a 0°–45° removal angle and a surface temperature above 55°F (13°C), while XPEL similarly recommends warming its temporary PPF and pulling at less than 45°.
For vehicle owners replacing an old film, proper removal is also the first step toward a successful new installation.
If your goal is to continue protecting the original paint, explore ALUKOVINYL’s clear ppf wrap options. If you want to change the vehicle’s appearance while maintaining paint protection, color ppf can be considered as an alternative.
And if your priority is primarily appearance and customization, a traditional car wrap offers a broader range of colors and finishes.
The best removal method is the one that protects both the film installer and the surface underneath it.